We had another big week of progress on the home front! If you’re playing catch up, you can check out before photos from the day we moved in, house progress in week one, and house progress in week two. After this week, we’ll need four more days to paint the master bedroom and a couple days to wallpaper the nursery before we shift our focus to preparing for bébé to make his debut in late September! In our first month here we’ll have crossed off just about everything on our first round of projects and then our plan is to take a few weeks to nest (the cleaning and organizing, non-construction and painting variety) and a few months to settle into life with a newborn and replenish our savings before we tackle phase two of house projects early next year.
The biggest difference this week was probably in the master bedroom, where we hired a contractor to demo a closet and move a wall to create enough space for a king bed and two bedside tables. It’s incredible how much more open this room feels with just ~60 more square feet! This week they installed, sanded, and stained new hardwood floors and put up trim to match the new walls to the old. They wrapped everything up yesterday so we’re planning to paint this room next week and move our furniture in next weekend! It will be a little while before we’re able to build out the walk-through closet (which was previously a sitting room almost as large as the bedroom) but it will be exciting just to actually live in this space that’s transformed before our eyes these past few weeks.
New master bedroom floors and trim went in August 15-16!
The floors got their Provincial floor stain on August 17 and three coats of poly August 19-21.
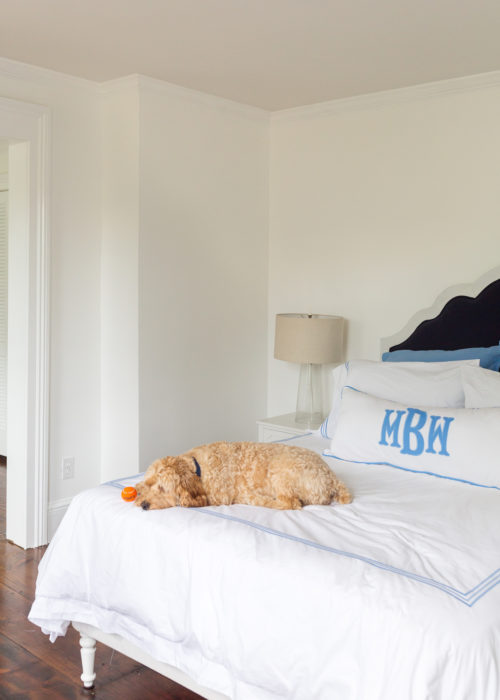
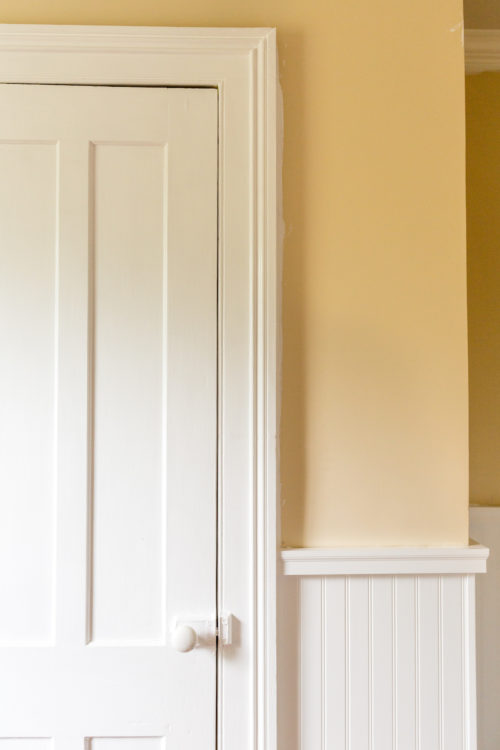
Demoing the closet in the master bedroom also meant eliminating a superfluous closet accessed from the guest bedroom on the other side of the same wall (which has its own sitting room with ample closet space). The closet door in the guest bedroom was closed in this week and the wall now looks like there was never a door there to begin with! Once the opening was closed and the trim was installed, my mom, brother, and I painted two high gloss coats on the trim and two satin coats on the walls in the same Ultra Pure White color we’ve used everywhere else in the house. I’m sure over time we’ll want to paint different rooms different colors (though I imagine we’ll always be happy to have high gloss white trim!), but in the interest of time we decided to get a fresh coat of white paint up in as many rooms as we could and it’s made the whole house so much lighter and brighter. The guest bedroom in particular is very bright and happy and we happen to be hosting our first house guests for my baby shower this weekend, so that was excellent motivation to get it painted and move some furniture in! Again I anticipate making lots of decorating tweaks in here down the road, but for now white walls and the same set-up as the guest bedroom in our previous house feel like massive progress from how this room looked the day we closed.
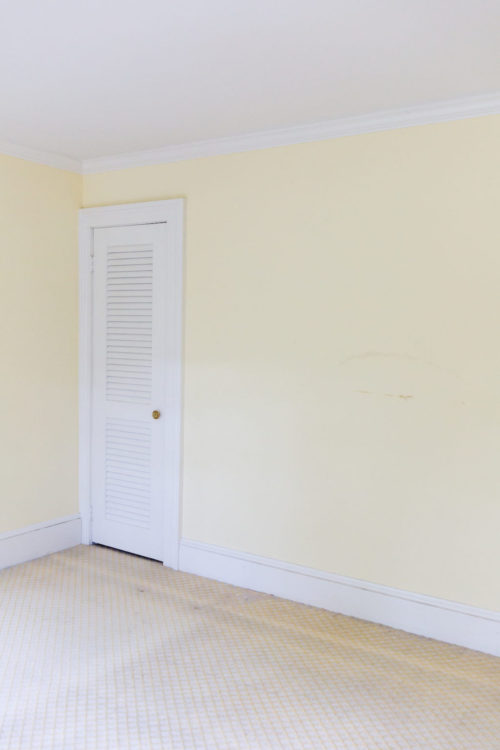
The tiny closet door in the guest bedroom that we closed in to demo the closet jutting into the master bedroom and be able to center a bed on this wall. This was the guest bedroom the day we closed on July 23.
The same wall on August 22.

Basically recreated our previous guest bedroom set-up in time for friends to visit this weekend!
We finished painting the living room this week before moving on to the guest bedroom and it makes me happy to see those clean white walls when every time I come through the front door. The mantel looks particularly dreamy in high gloss white! We have practically zero furniture for this room but at least now it’s the definition of a clean slate.

acrylic console // acrylic x-bench // similar lamp // similar birdcage chair
And the most exciting progress this week was in the nursery! We hadn’t done anything in here besides paint the trim so I was super excited for my dad to get back from Nantucket so we could start tackling this room. We’re so lucky that my dad is extremely handy and still had a week off before returning to his teaching job next week because his beadboard and chair rail handiwork completely transformed this cozy space! We’re still waiting on the wallpaper that will be hung above the chair rail (see plans for the nursery here) but it really looks like the beadboard was original to the house.
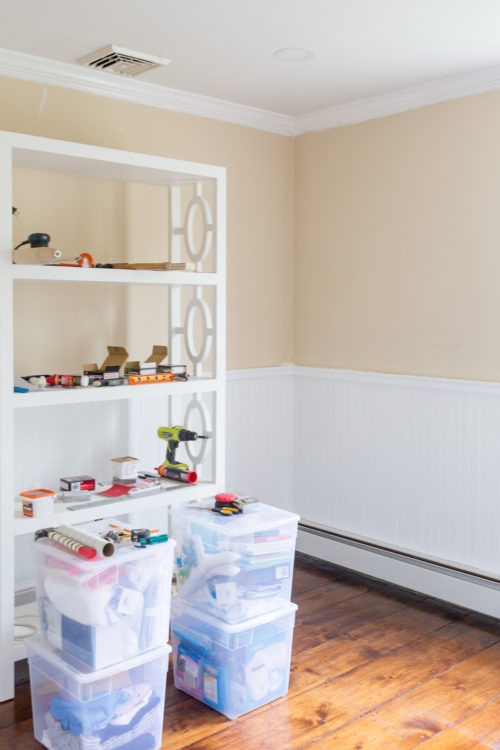
exact beadboard panels // exact chair rail // similar bookshelf
I got a few questions asking how my dad installed beadboard on plaster walls so here was his process! We bought the beadboard in 4’ panels and he used a saw to cut them down to the size of each wall. He applied wood glue to the back of each panel and further secured it by drilling screws into the plaster, which he later covered with wood filler, sanded down, and painted right over. (You truly can’t tell where the holes once were!) We cut enough chair rail in the store to cover the perimeter of the room and then he used a saw to angle the corners and did the same glue, screw, fill, and paint process for the chair rail that he’d done with the beadboard. Before painting everything he also cut quarter rounds for the interior corners of the room and caulked any small gaps between beadboard panels or chair rail corners. The project took four full days from start to finish and absolutely would never have happened without him!
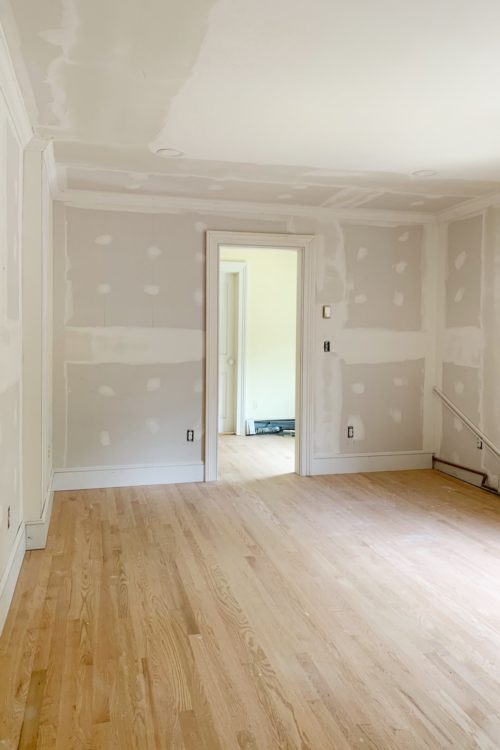
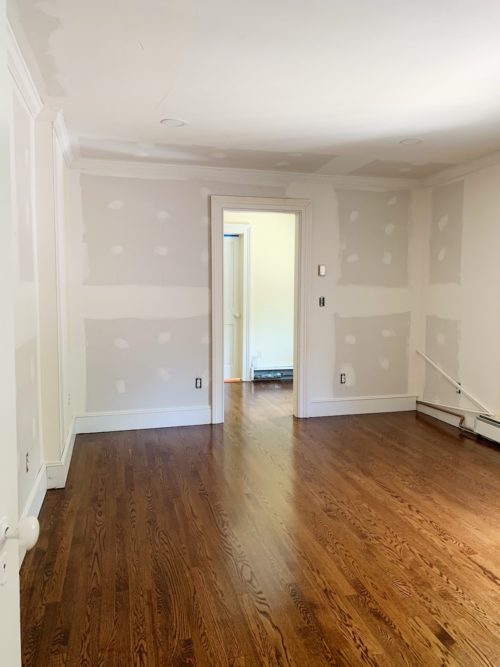
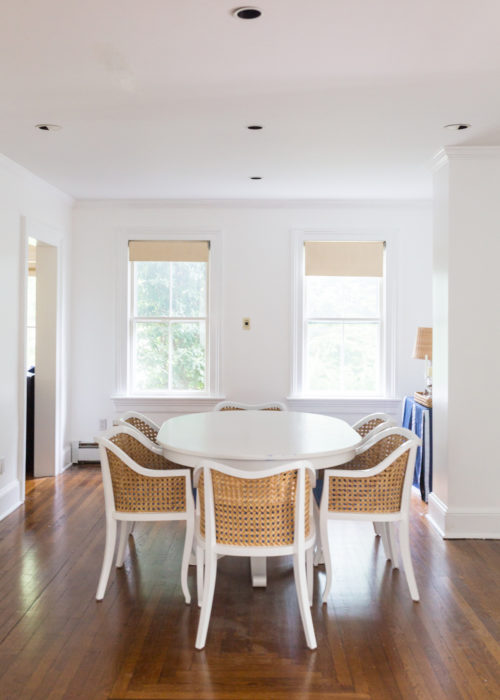
The dining room table was covered in various tools and paint cans until we started tidying for this weekend, so I’ll end today’s post with a couple photos of the dining room that give you a better feel for the one I shared in last week’s update. It’s possible our current dining room furniture will wind up in more of a breakfast nook scenario when we renovate the kitchen next year but for now it’s light, bright, and a place to eat! It’s going to be hard for me to put a rug on those floors… so wild to think they were covered in carpet less than a month ago!

faux fiddle leaf fig // basket // dining chair
Shop the post:
